How To Create A Collage In Lightroom
Adobe Lightroom offers a host of useful features, including creating collages. Whether for professional use or making personal albums, being able to make quality collages quickly is a handy skill.
In this article, we will show you to easily make a Lightroom collage!
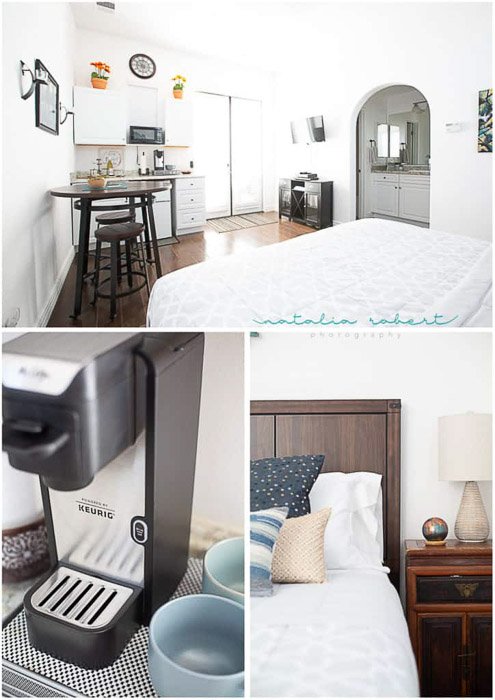


Finding the Collage Feature in Lightroom
You can find the collage feature in Lightroom under the Print Module. While the Print module is intended to create pages for printing, the option to save these pages as a JPEG gives you the ability to create a collage!
Using the Print Module
It may seem straightforward to find the 'Print Module', but it can be confusing if you're a Lightroom beginner.
You can find Print in the drop-down menu under the 'File' tab.
To make a Lightroom collage, you'll need to go to the right side of the screen. In the modules section, select 'Print'.

Once you click on the Print module, go to the left side of the screen and click the 'Template Browser'.
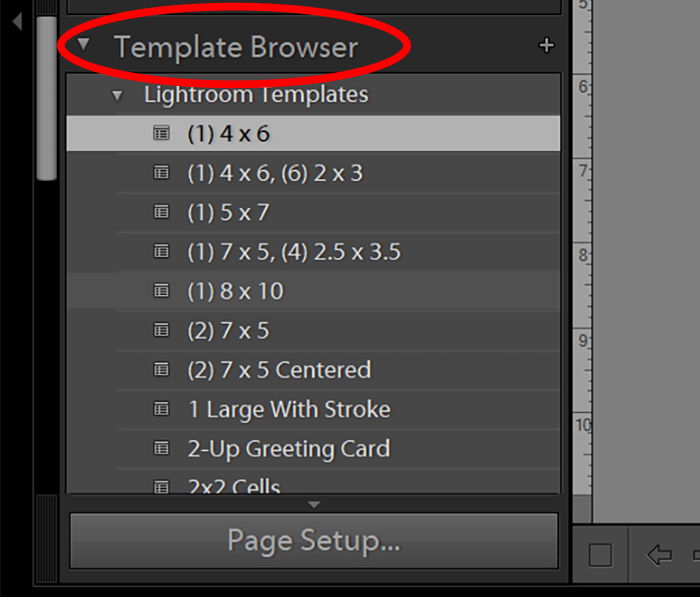
The first options are your regular printing template sizes, such as 4×6 and 8×10.
But as you scroll down, you'll find more collage templates in Lightroom. From there, you can choose anything from contact sheets to 2×2 cells.
Now, you're probably wondering what to do if none of these options are suitable. In that case, you can choose a customisable collage template. Once selected, you can then change the size of your photos and even move them around the page.
Setting Up Lightroom Collage Templates
There is a bit of effort involved in first setting up your templates in Lightroom. But once you've learnt the basics, you'll be able to create collages with ease.
Whether it's to put two pictures side by side or to arrange ten photos in a large layout, the process is the same.
Basic Page Settings
To begin creating your Lightroom collage template, you need to think about your layout and file size limitations.
In this case, we'll assume that we have a 1000px width limitation, and we want to do a 3-photo layout with a landscape image at the top and two portrait images below.
The first step is to customise the settings along the right column to create our layout.
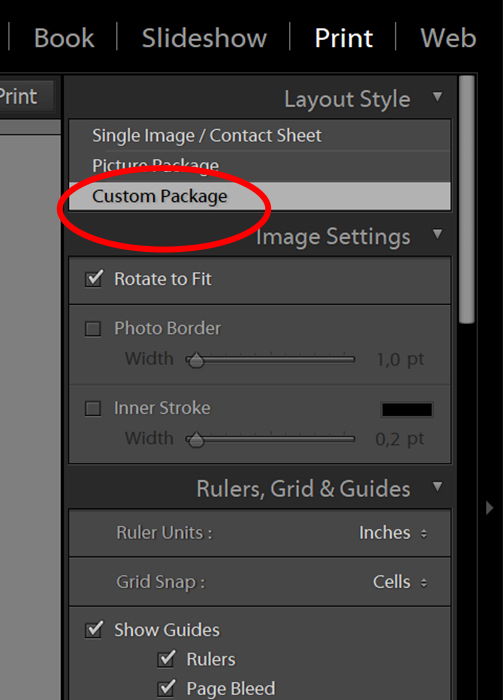
Step 1: Since you're creating your custom layout, you want to select the 'Custom Package'.
Step 2: If you want the photos to have a bit of white spacing around them, check the box that says 'Photo Border'. Doing so lets you select the thickness of that border by adjusting the slider. Usually, a thin border around 2 to 4pts is ideal.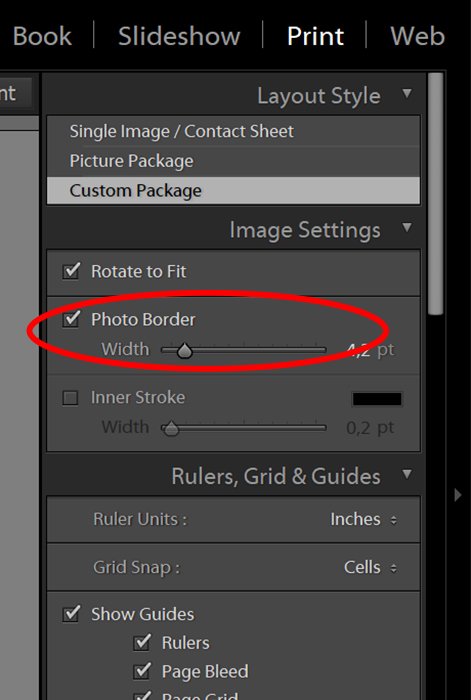
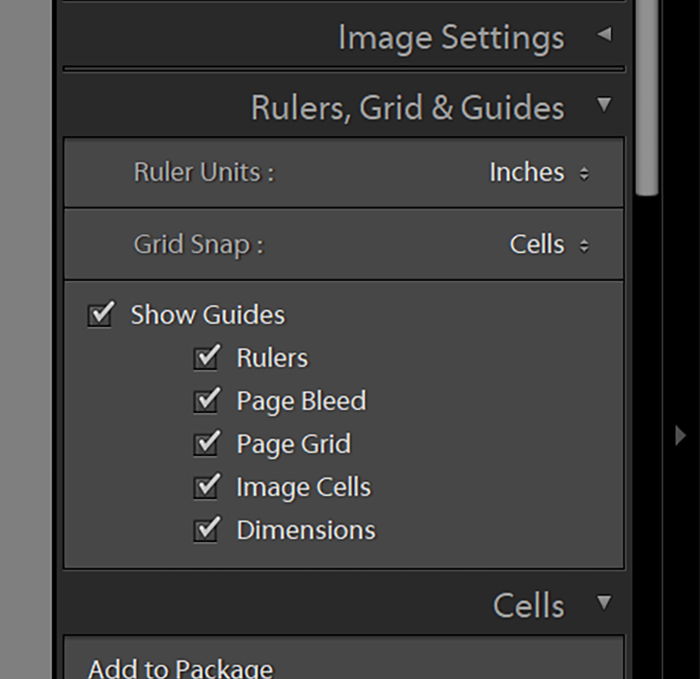
Step 3: In the next section, you'll want to select 'Inches' for your units. Also, select 'Cells' under the 'Grid Snap' options. Doing so makes it easier to put your photos right up to the edge of the page.
Then select which guides you want to see. Typically, we suggest checking all options apart from 'Dimensions', but this is up to your personal preference.
Step 4: Skip down to 'Print Job' settings. First, select JPEG File. If you're using these collages for web use only, set your 'File Resolution' to 100ppi.
Check the box for 'Print Sharpening', and set the level to 'High'.
Make sure you set the 'JPEG Quality' slider to 100.
Check the box for 'Custom File Dimensions'. The measurement is in inches, but since you have your resolution set to 100, it's a simple conversion. Simply divide your size in pixels by 100 to find how many inches it is.
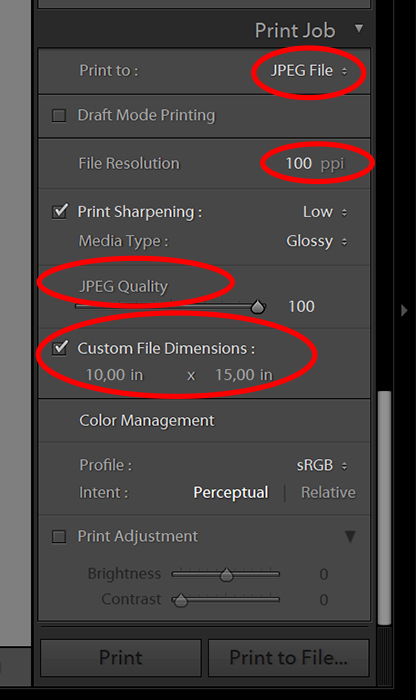
For example, if your image width is limited to 1000px, the width needs to be 10 inches. If you don't know what the height will be, set it as a larger number for now and adjust it later if needed.
Step 5: Now that you have your page set up, go back up to the 'Cells' module. Here you have pull-down menus with standard photo sizes.
Select the photo size you want, and it'll appear on the page instantly. You can then move it into position and stretch it to fit the layout you want.
When stretching the cells, be sure to hold down the Shift key so that the ratio remains the same.
How to Place Your Watermark On a Collage (Optional)
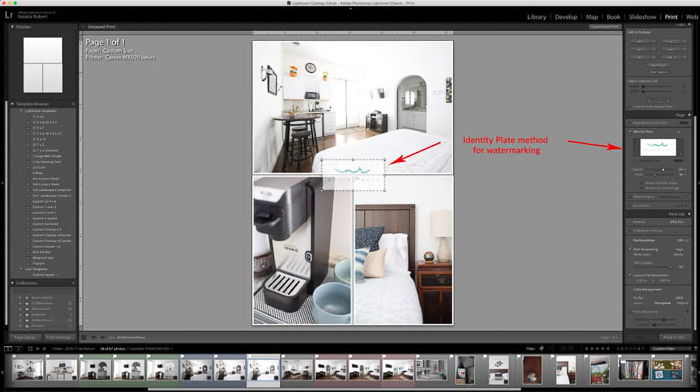
There are two ways to add a watermark or logo in the page module. If you check the box for 'Identity Plate', you can upload an image to add to the page.
The identity plate is shown once on each collage, and you can drag it to wherever you want on the page. The sliders also adjust their opacity and scale, so you can make it more subtle if you'd like.
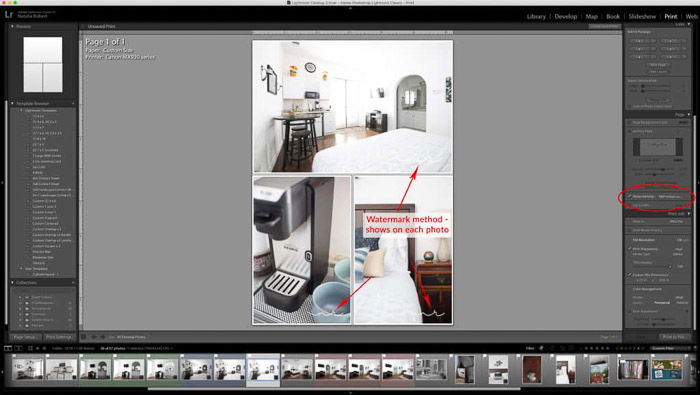
Another option is the 'Watermarking' checkbox. If you check this box, you can then use the pull-down menu to select from the watermarks that you've previously loaded into Lightroom.
These are the same watermarks that you can use when you export a photo.
But, when using the watermarking method, you don't have the options of opacity, scale, and location.
Lightroom automatically lays out the watermark, and it puts it on each photo in the collage.
Save Your Template
Now that you have your collage template all set up, be sure to save it so that it's ready for use in the future!
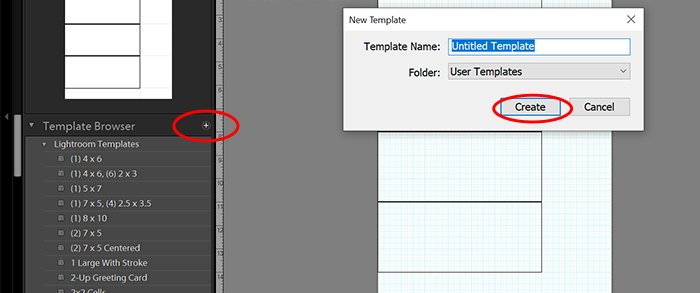
To save your template, click on the '+' sign on the top of the left column.
A new window will pop up for you to select what section to save it in and what to name it.
Keep the name simple and something that you'll recognise easily each time you look for this layout.
While you're creating this template, take time now to think of other layouts that you want to have at your disposal.
Create different layouts that serve your needs. That way, you don't have to invest too much time into creating new Lightroom collage templates every time.
Using Your Templates
The beauty of creating templates is that once you've saved them, they will stay in Lightroom.
To use your template, select it from the left column. Now simply drag the photo you want to insert and drop it into the cell you wish to place your photo.
Do this to each cell in the layout, and that's it! You don't need any resizing or watermarking since it's all set up in the template settings.
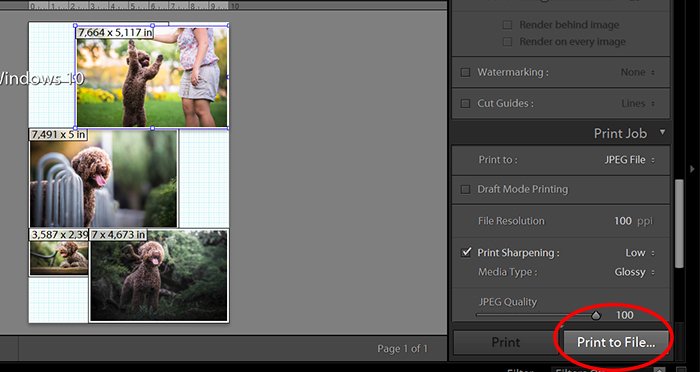
When you're happy with your chosen photos, click on 'Print to File…' in the bottom right column. It opens up a window for you to select where to save your Lightroom collage and what to name it.
Common Questions
How Do I See Before and After Side-by-Side in Lightroom?
As photographers, we sometimes have to create before and after photos. The good news is that you can easily make them in Lightroom using the collage feature.
Now that you know all the steps to create collages, you'll find doing Before and After photos quite easy. All you have to do is any template with two cells, and that's it!
Is Another Way to Make Collages?
In most cases, it only takes a few moments to create a collage in Lightroom.
But Lightroom collage's customisability has its limitations. For instance, it doesn't allow you to change border colours. It's also doesn't let you adjust parameters as Photoshop does. So, Photoshop can also be a great tool for creating photo collages.
You can also use online sites like Canva. Canva's big advantage is that it can be directly connected to Facebook. It also offers various free collage designs that you can choose from.
Still, knowing how to use this feature in Lightroom is useful, especially if you need to do quick edits. It provides the highest image quality and easy saving options. And you can even convert TIFF files into a collage to maximize the quality of your JPEG's.

Conclusion
It's worth investing a little effort and mastering collages in Lightroom. This gives you a quick and easy way to create collages without needing to leave Lightroom.
We hope that our article has helped you with creating collages in Lightroom. Use this method to develop your Lightroom workflow and save up time!
To use Lightroom like a pro, check out Effortless Editing with Lightroom!
How To Create A Collage In Lightroom
Source: https://expertphotography.com/lightroom-collage/
Posted by: milsapmustrien.blogspot.com

0 Response to "How To Create A Collage In Lightroom"
Post a Comment